
A short guide to configure your new SAROO cartridge from Retro Upgrades.
1. You will need a 1TB or less micro SD card. We recommend the SanDisk series.
2. Format your SD card to exFAT or (optional) FAT32 using this tool. http://ridgecrop.co.uk/index.htm?guiformat.htm
3. Download the SAROO latest firmware here: https://github.com/martinx72/SAROO_Firmware/releases
4. Extract the firmware to the SD card as shown below, so that the SAROO folder is in the root of the SD card.
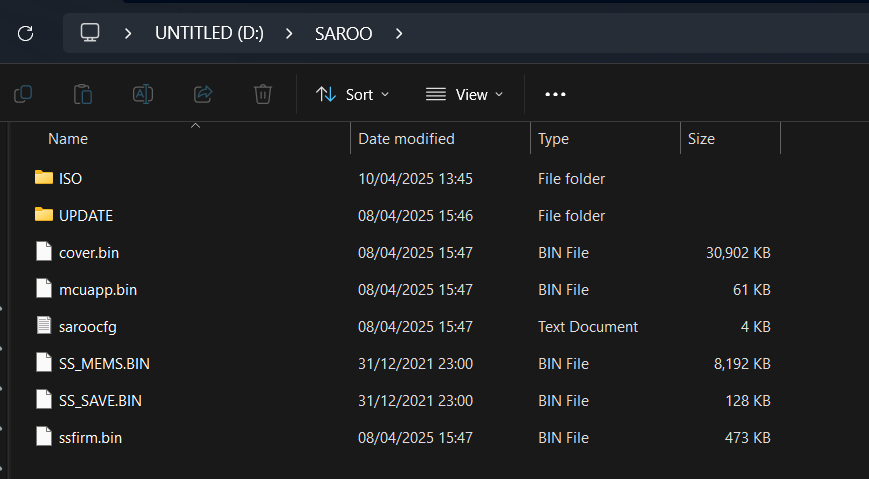
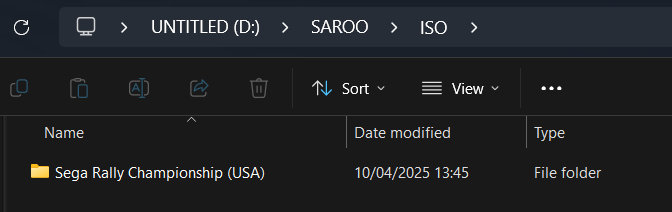
5. To add games, open the ISO folder. Here we can simply drag and drop our backup game folders.
Backup games should be in the .bin/.cue format.
6. Optional: changing the language to English. Open saroocfg.txt and adjust the following line to:
[global]
lang_id = 1
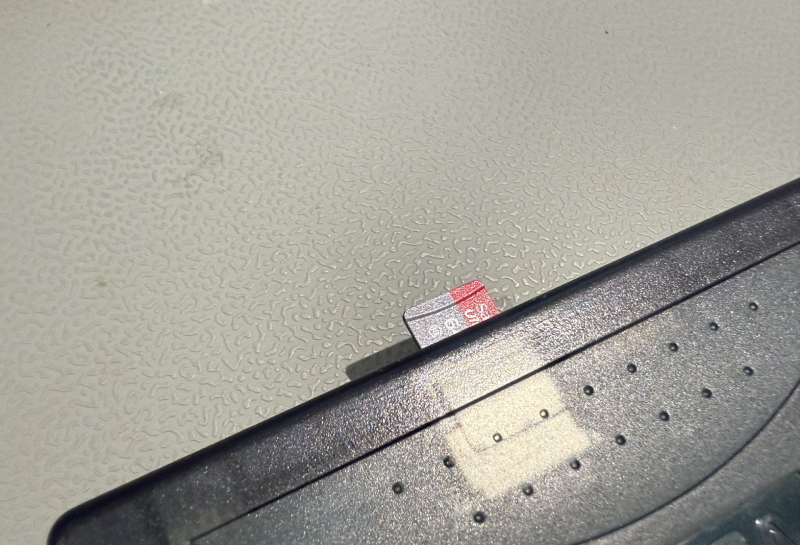
7. Setup complete. Gently insert the SD card into your SAROO cartridge as per below. It can only be inserted one way (pins facing the obverse of the cartridge). Use a fingernail or small object to push the SD card until you hear a click. There is also a picture demonstrating the orientation on the rear of the packaging.
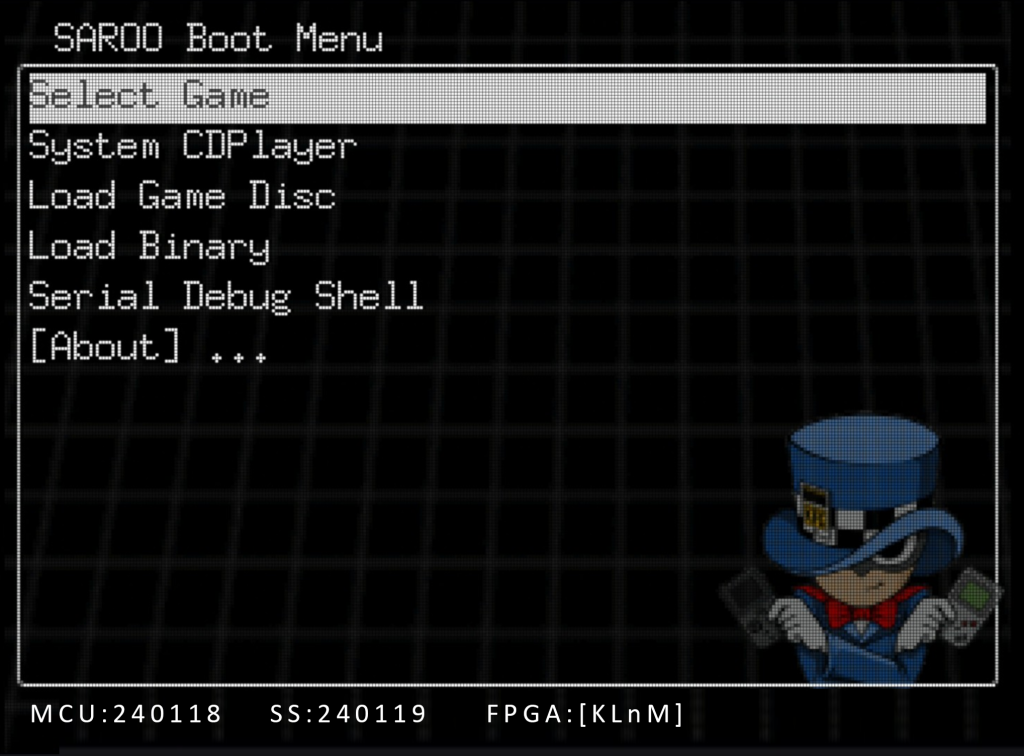
8. Insert the cartridge into your Saturn console and power it on. After the booting sequence, you will be presented with the SAROO boot menu.
Notes
- The shell obverse and reverse has clear protective film strips applied which cover the transparent parts of the shell. Please remove the film strips before applying any label stickers.
- Noises or freezes: the latest revision has a switch on the reverse of the PCB. The switch is used to solve interference or system freezes that may occur on early models i.e. VA0. A video of how to set the switch can be found here.
If you have any questions or need support, please send us an email at [email protected]