
If you wish to purchase a kit, please click here.
Contents
Please click below to skip to each section.
1.0 – Full Installation Guide
1.0 – Full Installation Guide
The full installation guide covers installation in a PU-18 PS1 motherboard. For other revisions, the only difference will be that the ‘RST’ point will be located elsewhere on the board. If you have another revision PS1 board, please see here to find the ‘RST’ point.
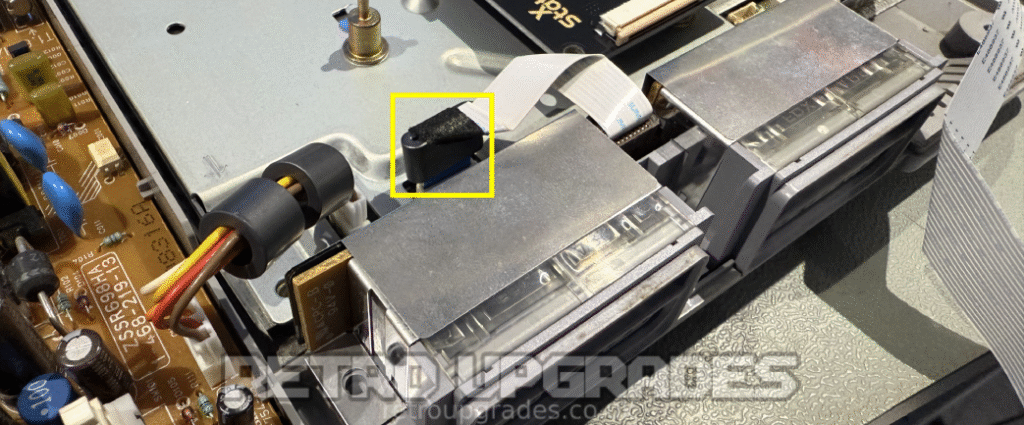
Locate the PS1 controller module at the front of the console. Disconnect it from the main board by carefully disconnecting the ribbon wire highlighted above.
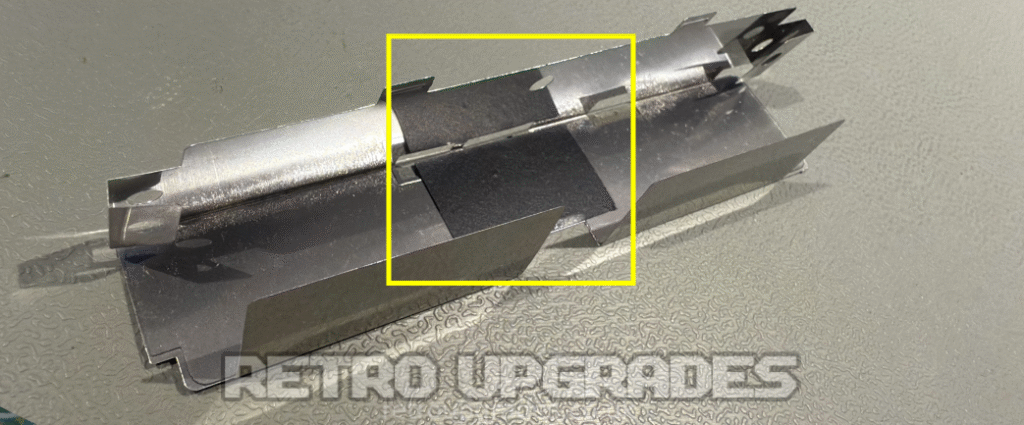
Remove the metal shielding from the PCB and add some electrical tape to isolate the PCB from the shield.
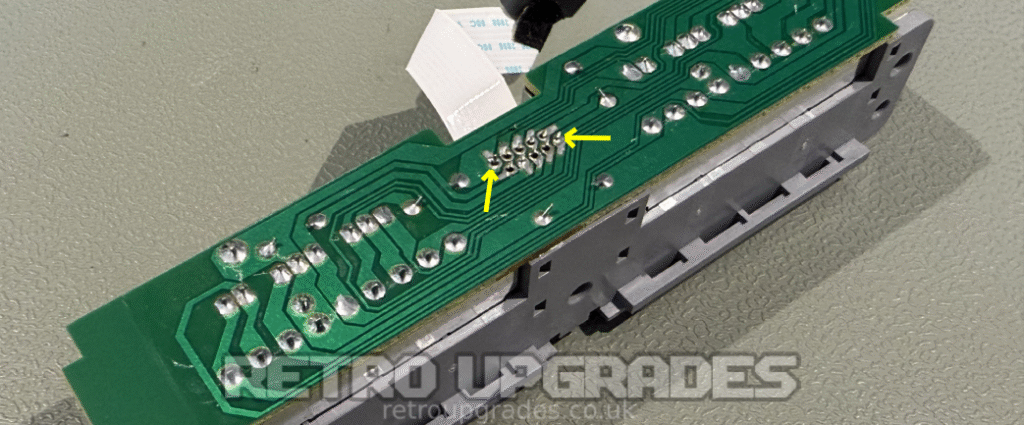
Optional: where the IGR board will be mounted, there are two pins highlighted which lay flat on the board. We find it easier to desolder and straighten these pins out before mounting the PCB. This step can be skipped, but the board will not sit flush with the controller PCB.
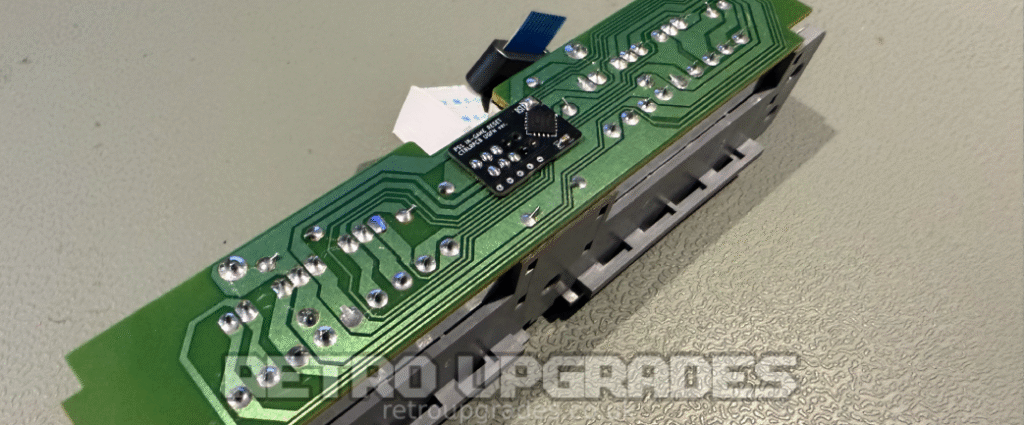
Solder in the IGR board over the top of the 10 pins. Ensure ALL 10 pins are soldered in place.
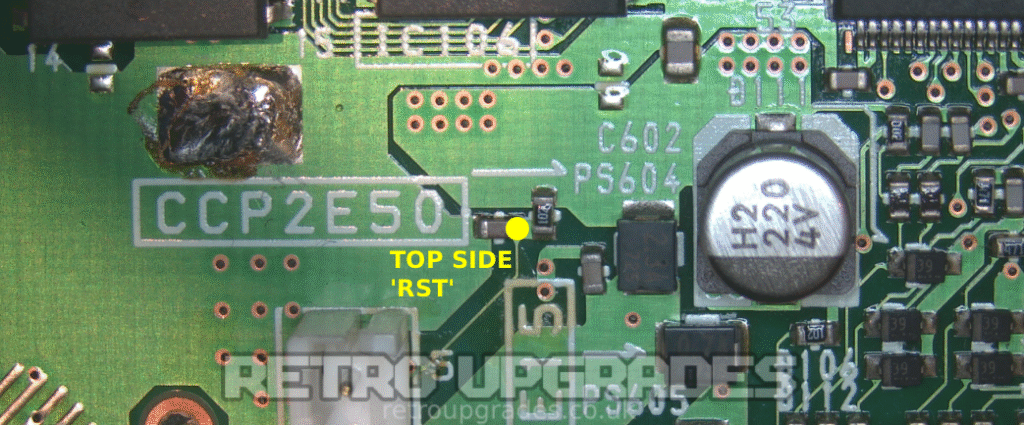
There are two points we can use for reset on the PU-18 board. The first point is on the top side of the PCB but requires removing the metal shield on the main board. It is located next to ‘IC106’.
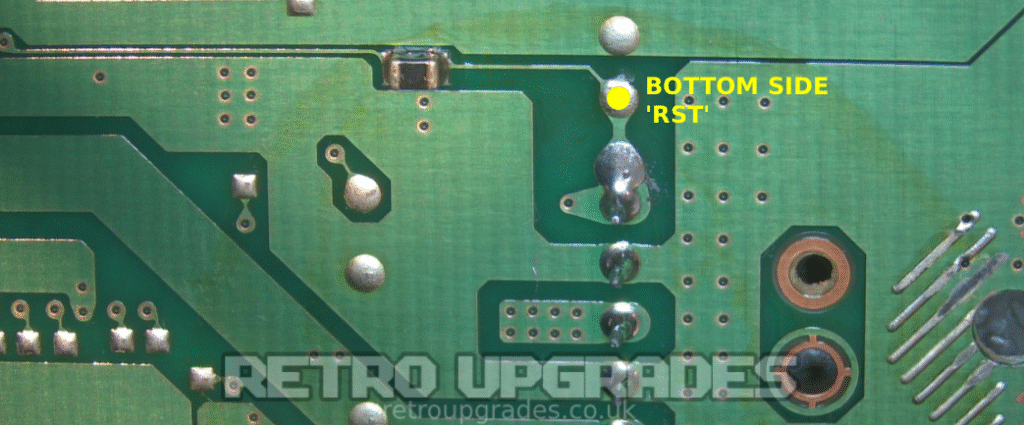
Alternatively, the second point is on the bottom side underneath where the ribbon cable connector is located.
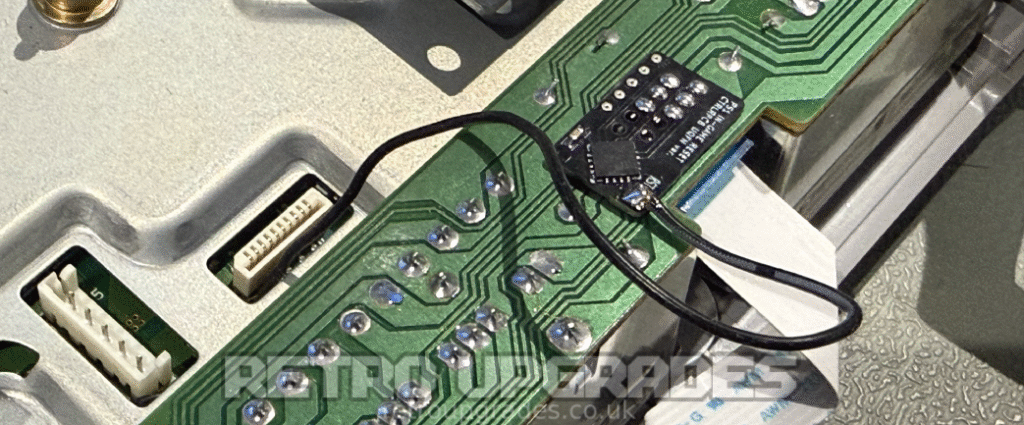
Run the other end of the wire through the metal cut-out for the ribbon cable and solder to the ‘RST’ pad on the IGR board. Reassemble the controller PCB metal shield and place it back in the console shell.
Complete. Button combinations can be found on the product page here.